Our Process
The Golf Simulator Installation Process, Start to Finish.
The golf simulator installation process should be easy to follow and honest at every step. Here's exactly how we take a room from the first conversation to your first round — eight steps, one accountable team, no handoffs.
It all runs on one method: Goal. Budget. Design. Build. We start with the golfer, not the gear — what you want from the room and what you'll spend — then design to your space and build it as one team that owns the whole job.
30 years in KC construction · 5 bays we built ourselves · one team, start to finish

The Build, Step by Step
The golf simulator installation process, step by step.
Eight steps, in the order we actually follow them. Every build runs this path — whether it's a weekend install or a month-long custom room — so you always know what's next and who's accountable for it.
It all maps to four words — the method behind every build
Goal
Start with what you want from the room — not a kit, not a brand.
Budget
Map what your space and budget can actually support.
Design
Lock the design, the equipment you choose, and a full proposal.
Build
Construct, install, calibrate — one accountable team, no handoffs.
- 01
Goal
Start a Conversation
Every build starts with a conversation, not a contract. Tell us the room you're picturing and what you want out of it, and we'll tell you honestly whether it's a quick install or a full build — and what that means for your space and your budget.
Start a conversation - 02
Goal
Discovery & Room Review
We dig into your goals, then come see the actual space. We measure what matters — ceiling height, depth, width, power, light, and the ductwork most people forget — so the plan is built on the real room, not a guess.
What your space needs - 03
Budget
Budget & Possibilities
Before any design, we map what your space and budget can actually support. This is where your dream state meets the room's reality — we narrow the possibilities to the ones worth your money and show you the trade-offs honestly.
- 04
Design
Design, Equipment & Proposal
We finalize the room design, the equipment you choose, the materials, and a full itemized scope proposal. You see exactly what you are getting and what it costs before a single board is cut.
How design + build works - 05
Build
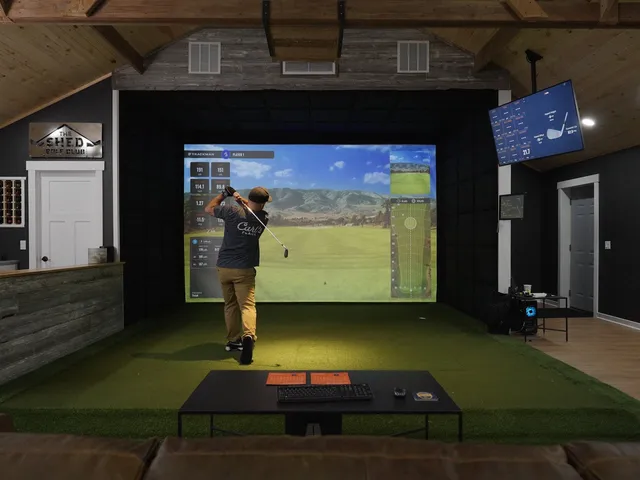
Build — Construction
Framing, drywall, flooring, lighting, trim, and any electrical the room needs — handled by the same construction crew that built our own five bays. This is the part most simulator companies sub out. It is the part we are built on.
Meet the crew - 06
Build
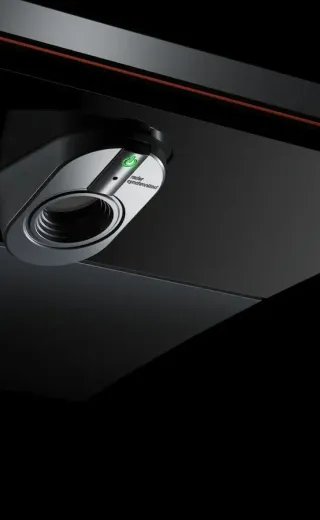
Equipment Installation
Enclosure, screen, projector, mat and turf, mounting, and clean cable runs — installed and squared by the same team, not dropped at your door in boxes. A clean install is the difference you feel every time you swing.
- 07
Build
Calibration & Final Walkthrough
We dial the numbers in until they are true and the picture sits square, then walk you through running the room yourself. You start hitting the day we finish, not the weekend after.
- 08
The Payoff
The Room-Warming
The last step is the best one: we help you plan the first round in your new room. Call it a room-warming. You spent months picturing this — we want it to be real, and we want it to be good.
Why It's Different
One team. One schedule. One point of accountability.
Most simulator companies sell you a package and sub out the construction to whatever contractor is free that week. That's where builds go sideways — the room and the equipment never met until the day they're forced together. We do it the other way around: we're a construction company that specializes in simulators, so the same people plan it, build it, and dial it in.
- The same crew frames, finishes, installs, and calibrates — no handoff to a contractor who has never seen your plan.
- One schedule and one point of contact, start to finish, so nothing falls through a gap between vendors.
- We self-perform the finish craft — trim, drywall, flooring — that makes a room still look right in three years.

How Long It Takes
How long does a golf simulator build take?
It depends on the scope. Here's what our builds actually run — we confirm your timeline after the room review, not before. For a deeper breakdown of what drives the schedule, see our installation timeline guide .
A few days
Equipment Install
A finished, ready room where we install and calibrate the equipment with little or no finishing work.
Most common
2–4 weeks
Full Room Buildout
A basement, garage, or room that needs real construction — framing, finishing, install, and calibration.
Scoped per build
Fully Custom / New Build
New construction or a fully custom room, where the timeline is set by the build and confirmed up front.
FAQ
Process questions.
01 What are the steps to install a golf simulator?
+
Our golf simulator installation process runs eight steps: a first conversation, discovery and an on-site room review, budgeting, a finalized design and proposal, construction, equipment installation, calibration and a walkthrough, and finally planning your first round. The same path runs on every build.
02 What happens during a golf simulator site visit?
+
We measure the things that decide whether a room works — ceiling height, depth, width, available power, lighting, and any ductwork in the way — and talk through how you want to use the space. It is how we build the plan on the real room instead of a guess.
03 How long does a golf simulator build take?
+
A clean install in a ready room is usually a few days. A full basement or room buildout typically runs two to four weeks. A fully custom or new-construction room is scoped per build. We confirm your timeline up front, after the room review.
04 Do you use subcontractors for the construction?
+
The core construction is ours — the same crew that framed and finished our own five bays does your build. We bring in licensed specialty trades only where the law requires it (some electrical, for example), and we manage them on one schedule. The finish craft is never handed off.
05 When do I choose my launch monitor and equipment?
+
At the design and proposal step, before any construction starts. We install every major brand and help you choose based on your goals, budget, and space — not on which brand markets the hardest. You pick it; we install it well.
06 What is a room-warming?
+
It is the last step, and our favorite — we help you plan the first round in your finished room. Most builders stop at calibration. We would rather be there when months of planning turn into your first real session.
Ready to start the conversation?
Step one is a conversation, not a contract. Tell us about your space and your goal — or come see a finished build at the showroom first. Either way, it's a conversation, not a commitment.
See this process finished